Sand Tray: Difference between revisions
From Montessori Album
| Line 11: | Line 11: | ||
This activity allows the child to practice forming written letters. | This activity allows the child to practice forming written letters. | ||
== Presentation == | == Presentation == | ||
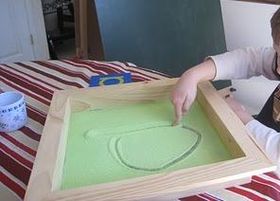
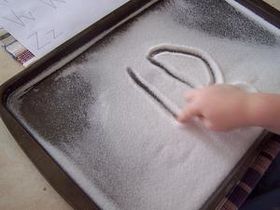
# | # Allow the child to experiment with the sand tray by making basic shapes or lines. | ||
#: [[Image:Sand Tray 1.JPG| | #: [[Image:Sand Tray 1.JPG|250px]] [[Image:Sand Tray 2.JPG|250px]] | ||
# Select a letter to practice. Trace the sandpaper letter, then make the same letter in the sand. | |||
#: [[Image:Sand Tray 3.JPG|260px]] | |||
# | # Show the child how to rub their fingers together over the tray to clean them. | ||
#: [[Image:Sand Tray 3.JPG| | # Show the child how to gently shake the tray side-to-side to clear it. | ||
== Points of Interest == | == Points of Interest == | ||
Revision as of 16:30, 19 August 2013
| Sand Tray | |
|---|---|
| Language - Writing | |
 | |
| Level | Primary |
| Prerequisites | Sandpaper Letters Touch Boards |
| Materials | fine sand or salt tray of a contrasting color |
This activity allows the child to practice forming written letters.
Presentation
- Allow the child to experiment with the sand tray by making basic shapes or lines.
- Select a letter to practice. Trace the sandpaper letter, then make the same letter in the sand.
- Show the child how to rub their fingers together over the tray to clean them.
- Show the child how to gently shake the tray side-to-side to clear it.


Points of Interest
Control of Error
Variations and Extensions
- A chopstick or other tool could be used to practice with the sand tray.

Material
Make Your Own
- This sand tray was made from a shadow box:
- Source: What DID We Do All Day?

- Salt can be used instead of sand:
- Source: A Handmade Childhood

- This was a zen sand garden purchased from a dollar store:
