Rough and Smooth Boards
| We've updated our prices on products from many online Montessori stores! If we've missed your favorite store, please let us know! |
| Rough and Smooth Boards | |
|---|---|
| Sensorial - Tactile Sense | |
| Level | Primary |
| Age | 2.5 - 3 |
| Prerequisites | none |
Also called Touch Boards.
The purpose of this activity is to develop the child's sense of rough and smooth, and to teach the accompanying language. Using the touch boards also prepares the child for using the Touch Tablets and the Sandpaper Letters.
Presentations
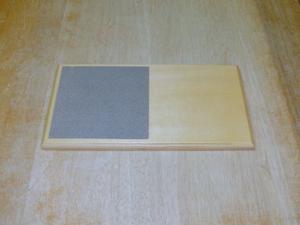
Board 1
- Secure the board in place using your left hand, but make sure it is not blocking the child’s sight or touching one of the rough or smooth parts
- Gently place your right hand at the top of the rough half and gently stroke the rough half from top to bottom.
Reminders
- Remember to keep your hand relaxed.
- Repeat in the same manner for the smooth half.
- Repeat both sides.
- Invite the child to touch in the same manner as you have done.
- Once the child has felt the board, you feel the board in the same manner as before, this time saying “rough” when you are touching the rough part and say “smooth” when you are touching the smooth part.
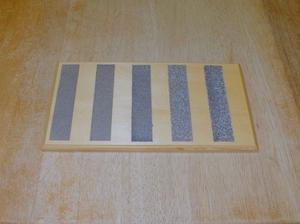
Board 2
- Secure the board in place using your left hand, but make sure it is not blocking the child’s sight or touching one of the rough or smooth parts
- Gently place your right index and middle fingers at the top of the first strip (the strip furthest to the left)
Reminders
- Gently trace the strip from top to bottom.
- Repeat for all of the other strips.
- Remember to keep your hand relaxed.
- You can also close your eyes to feel better.
- Invite the child to feel this board.
- Then you feel the board in the same manner as before, this time saying “rough” as you pass over the rough parts and say “smooth” when you are touching the smooth parts.
Board 3
- Secure the board in place using your left hand, but make sure it is not blocking the child’s sight or touching one of the rough or smooth parts
- Gently place your right index and middle fingers at the top of the first strip (the strip furthest to the left and the one closest to smooth)
Reminders
- Gently trace the strip from top to bottom.
- Repeat for all of the other strips.
- Remember to keep your hand relaxed.
- You can also close your eyes to feel better.
- Invite the child to feel this board.
Points of Interest
Purpose To refine the tactile sense. To acquire better muscular control through lightness of touch. Preparation for writing.
Language
Rough and Smooth (boards 1 and 2)
Control of Error
The sandpaper guides the child's hand
Variations and Extensions
Materials
Board 1:
One divided into two halves: the first half is polished and the second half is covered in sandpaper.
Board 2:
One divided into ten strips: five strips are polished and five strips are covered in sandpaper as with the previous one.
Board 3:
One divided into five strips from very rough to nearly smooth, starting with the same grade of sandpaper that is used in the previous boards (the sandpaper then in gradations of roughness).
Where to Buy
Prices and links checked: 23 January 2022
| Rough and Smooth Boards | |
|---|---|
| Store | Price |
| Absorbent Minds | £9.99 GBP |
| KidAdvance | $23.99 |
| Nienhuis-USA | $38.80 |
| Thinkamajigs | $27.95 |
Further Reading
- Basic Montessori: Learning Activities for Under-fives by David Gettman, page 99-100
- Teaching Montessori in the Home: The Pre-School Years by Elizabeth G. Hainstock, page 55, 92

